Wet Felting? Dry Felting?

A common question we hear in the shop is people wondering what the difference is between wet and dry felting. The quick answer is that wet felting uses water and soap where dry felting does not. The full answer is a bit more complicated because there are really more than only two techniques of felting and they could all be used together in the same piece!

kyla-corbett.jpg
Owl by Kyla Corbett

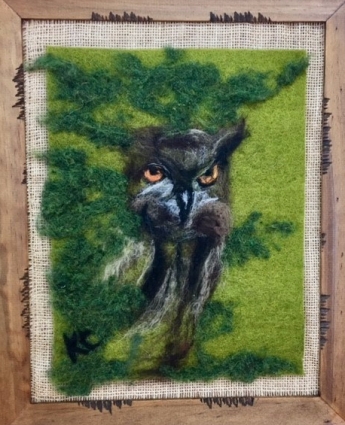
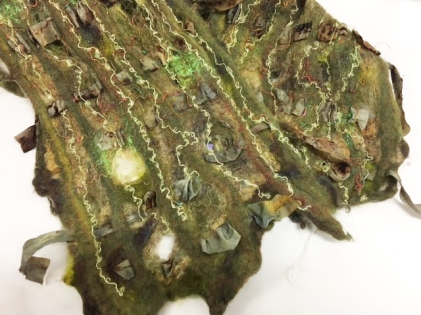
Wool becomes felted when its fibers become entangled and meshed together. This can be accomplished through the use of needles with barbs that work to tangle the wool each time they are passed through the bundle of wool. Typically, this technique is used to create three dimensional objects, or to add fine detail to a wet felted piece. Entire “flat” pieces of art can be created with just needles. Our gallery for July features art by Kyla Corbett who uses exactly this technique.

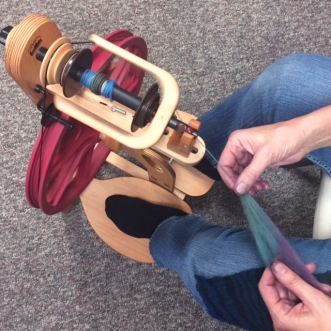
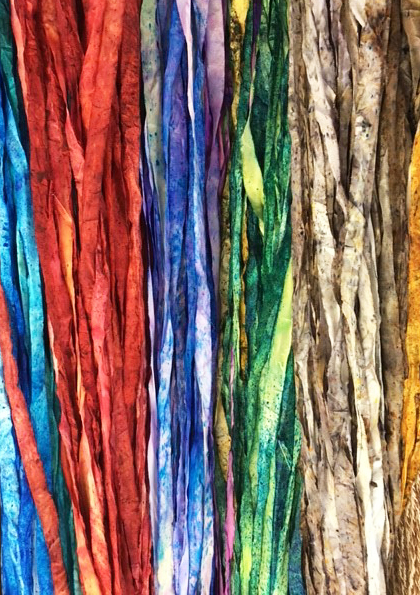
Another way to get wool to felt it through the friction of the fibers rubbing against themselves. Heat, water, and an alkaline PH (usually achieved by adding soap) are combined to allow the opposing layers of wool to tangle together. All three of these elements are present in your washing machine which is why wool sweaters can shrink and felt if you aren’t careful when you wash them!

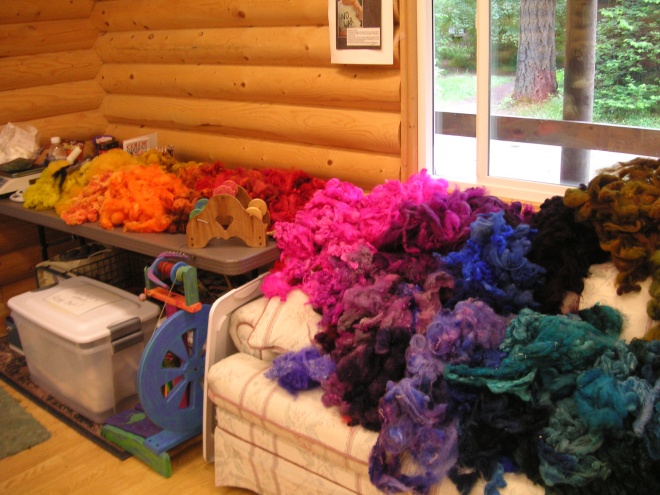
This technique is often used to create flat pieces, designed with interspersed layers of fiber. More interesting designs can be create through the use of a resist (like a plastic form) to create hats or pockets or layered with another material like silk to create a laminated material called Nuno. The same principle can also be used on a three dimensional piece to create a smooth surface finish in less time than it would take to accomplish with just a needle.

felting-2-pam-degroot
Various felted pieces by Pam de Groot.

If these techniques sound interesting, we have Pam de Groot, the world-renowned felt artist and eco-printer coming to ETC from July 22nd to July 26th to teach her Dimensions and Texture in Felt workshop as well as her workshop on eco-printing (which can work with felt).


TEXTILE TALK TUESDAY~Inkle Band Weaving

two ladies talking old ad textile talk tuesday

Q.  What can I make with my Inkle bands? 

inkle bands

A.  The projects are endless!  Here are some to get you started!

First, the obvious—Straps:

Purse / bag strap

Guitar strap (or other musical instruments that use straps, like accordions, harps, or drums!)

Canteen / water bottle strap

Inkle band yoga bag example

Luggage straps

Glasses strap

Camera strap

Yoga mat strap

A Backstrap!

You can use them for clothing / accessories like…

Shoelaces

Bracelets

Headband

Pant leg restraint for bicyclers

Watch band

A belt

Key fob

Lanyard

The strappy parts of a sandal

Ribbon

Suspenders

Zipper Pull

Leashes

Collars

Bookmark

inkle weaving shoelace.jpg

Or attach the straps to existing items

Blanket binding

Clothing trim

Furniture trim

Grippy handle for tools or knives

You can also sew some together to make larger items such as:

Scarves

Sashes

Wallet

Purse

Small case for glasses, scissors, etc

Book cover

Pillow

Table Runner

inkle strap for purse.jpg

Rugs

Or with even more creativity (and stealing some ideas from macramé)

Plant holder

Wall art

Weave it into a soft basket

Soft balls or block toys

Renew a lawn chair

Hammock

Fruit Basket

Textile Talk Tuesday

two ladies talking old ad textile talk tuesday


QUESTION:            “How much yardage is in my cone of yarn?”

harrisville yarns.jpg

 ANSWER:

Most spun yarns use the “count” system.  It’s based on the number of yards in a pound of a single standard strand.  Size 1 is the lowest count and the thickest yarn of its given fiber.

Here are the yardages for size 1 of some common fibers:

Cotton, spun silk                           840 yds.

Linen, hemp, jute, ramie            340 yds.

Woolen                                           256 yds.

Worsted                                          560 yds.

To find the yardage of a yarn at a higher count, multiply the count times the yardage of size 1.  For example:  20 (20/1) cotton:  840 x 20 =16,800 yds/lb.

To find the yardage of plied yarn, multiply the count times the yardage of size 1 and then divide by the number of plies.  For example:  20/2 cotton:  840 x 20 / 2 = 8,400 yds./lb.

Eugene Textile Center carries the   Yarn To Yards Balance

yarn2yardsb.jpg

“This amazing little tool answers the mystery of “how many yards do I have of this yarn??  Easy to use – just hang a piece of yarn on the balance and clip bits off until the “teeter-totter” balances. Then, do the simple math (all instructions and simple formula are on the label) and you have a very close estimate of the yards of yarn. It works with handspun if fairly consistent, novelty yarns, mystery fibers, garage sale treasures, etc. Design that project with confidence knowing you will have enough yarn.”

You can purchase the Yarns To Yards Balance on our website at www.eugenetextilecenter.com


Featured ITEM of the Week!

IN-STORE  

HAND DYED SILK RIBBON

Janis has been dyeing up a frenzy at the shop!    These silk ribbons are sold in 3 yard increments at $3 a ribbon and make wonderful additions to any art project!

Silk Ribbon Dyed

silk ribbon example


WEBSITE

“AN EXALTATION OF BLOCKS”

BY ROSALIE NEILSON

an exaltation of block book photo

This is amazing new two-volume set by Rosalie Neilson is limited to 500.  We have been able to secure an additional 30 of them which are hand-signed and numbered.

About the Book:

An Exaltation of Blocks is a two-volume set of books by Rosalie Neilson on symmetric block design. The 140-page Volume One describes how motifs were developed to provide the interactive Toolkit of 72 printed Design Pages and 49 Transparent Overlays. It includes chapters on how to convert 6-block patterns into three different weave structures: Summer and Winter, Huck Lace, and Warp-faced Rep. It also includes a chapter suggesting ways to change symmetric motifs into asymmetric patterns. Volume Two contains the Toolkit of twelve envelopes where the Pages and Overlays are stored. The Toolkit is divided into two sections. Section One Design Pages and Transparent Overlays jump starts a weaver into 6-block patterns suitable for 8-shaft looms. The Section Two Design Pages illustrate the 1,024 4-block motifs which are also compatible with 8-shaft looms. The Transparent Overlays convert these into 5-, 6-, 7-, and 8-block motifs suitable for looms with more than eight shafts. The 9” x 12” book comes with its own storage box.

Only $125.00 with FREE shipping.

Order HERE


Featured Class of the Week!

~Warp & Weft Ikat Weaving~

Thursday-Sunday, August 17-20th

10am- 4pm

Taught by Textile Artist, Marilyn Robert

Warp & Weft Ikat Weaving

REGISTER HERE

ABOUT THE CLASS

Have you ever admired the Japanese, SE Asian and Indian ikat cloth? Wondered how it was done? This workshop offers a comprehensive introduction to this gorgeous ethnic weaving style. Examples of this cloth, many museum-quality pieces, will be available for inspiration. Participants will learn step-by-step design skills, preparation of the ikat warp, and indigo dyeing technique during the first 2 days. Weft ikat techniques will be introduced during the last 2 days, and students will weave warp ikat, weft ikat, and compound ikat to conclude the workshop. Students at all weaving levels are welcome. Because of the process, this workshop requires 4 full days to achieve admirable cloth.

ABOUT THE INSTRUCTOR

Marilyn Robert

Marilyn Robert has worked in the field of textile design and fiber art since the 1980s. Sheearned a Master of Fine Arts degree in Fibers from the University of Oregon. She has been the recipient of grants and awards, including a Japan Foundation Artist Grant in 1997 to travel in Japan for study of traditional indigo-dyed textiles and contemporary fiber art. Her artwork is exhibited internationally. She is the author of several articles about textiles, and enjoys curatorial work. She taught for thirteen years at Lane Community College as head of the Fibers program, and as an adjunct Fine Arts professor at the University of Oregon, both in Eugene, Oregon.

Marilyn is the co-founder of Eugene Textile Center and currently travels, lecturing and teaching workshops. In 2001, she organized a textile tour to Turkey, where she returned in 2012 for the First International Textile Conference in Istanbul. She teaches both


surface design techniques, such as dyeing, printing, mechanical and chemical manipulations of cloth, as well as handweaving. Marilyn is passionate about dyeing with botanical dyes and continues to teach and to learn more about this, her favorite subject.

To see all of our classes, click HERE


Featured Class of the Week!

~Beginning Spinning~

Saturday, June 10th 10am- 3pm

Taught by Janis Thompson

IMG_7488
Beginning Spinning

REGISTER HERE

ABOUT THE CLASS

This is an introductory course for those who wish to learn to spin their own yarn. Students will learn the fundamental techniques of handspinning. ETC has wheels to use during class. Each session is a one day class.

ABOUT THE INSTRUCTOR

Janis ThompsonJanis2

A whirlwind of artistic energy … Janis is always learning and sharing various media … mostly fibers, spinning, dyeing, knitting, felting, wire twisting, bead craft and RAKU. Janis is the owner of dyelots fiber studio in Eugene, an instructor at the Eugene Textile Center and the Educational Talks and Demonstrations chairperson for the BSG. She teaches, demonstrates and vends at many shows around the Northwest.


There’s still room in the class if you want to sign up!

To see all of our classes, click HERE

~Featured Class of the Week ~ DISCOVER DISCHARGE

DISCOVER DISCHARGE

Saturday, June 10th

10am – 3pm


ABOUT THE CLASS:

Discharge involves the art of taking away color.  See the design potentials and the results on various fibers dyed with different dyes.  Experiment with immersion discharge and applying discharge paste by brush and stencil.  Try using potato dextrin as a resist paste to mask areas of fabric and reserve the initial color.  Explore bleaching and thiox discharge.


ABOUT THE INSTRUCTOR:

Barbara Pickettbarbara-pickett

Barbara Setsu Pickett and her Son Michael create highly textured silk scarves for their Mihara Shibori Studio collections. Barbara is an Associate Professor Emeritus in the Department of Art at the University of Oregon. The focus of her teaching and creative practice is velvetweaving, shibori, natural dyeing and artists’ books. Michael specializes in indigo dyeing and shibori and has created unique shibori patterns.

REGISTER HERE